

Time: 4-6 hours (not including drying time)
Cost: $75-$120 depending on the parts chosen
Difficulty: Mid-level
Tools Needed:
Saw
Power miter or circular saw
clamps
Materials Needed:
The Legs:
- These can be purchased ready made for anywhere from $10-$20 EACH or
- (2) 2x2x36" Poplar/Oak strips for about $5 each which will make two 18" legs per.
To begin you will need 4 pieces of 2x2 wood each 18" long. We went with the Poplar 36" 2x2


Mark a measurement of 1/4" from the left edge

Line the mark up with your blade

Pressing the wood up against the miter fence, tilt the unmarked end it 3-4 degrees so that it is slanted to the RIGHT

Cut the wood and smile at your first taper cut

Now flip the wood one quarter turn to the right, mark a measurement of 1/4" from the left edge, pressing the wood up against the miter fence, tilt the unmarked end it 3-4 degrees so that it is slanted to the RIGHT, and cut.
This means each leg will have a taper on 2 touching sides. Repeat for the next 3 legs.

The Seat:
2'x4' - 3/8" plywood
(2) 1"x4"x8' pine or plywood strips
(2) 1"x2"x8' high quality pine/poplar/oak
(1) Screen Molding
(3) 1"x4"x8' pine lattice
Wood Filler/150 grit sandpaper or Kreg Jig to hide your screw joints
We like the dimensions of 48" long and 16" deep for the seating surface.. Cut your plywood to those dimensions, and then trim the outside border of the plywood with your 1"x4"

When your legs are positioned in the box, the two tapered edges will face the outsides of the corner.


Clamp two of the legs to the box and measure the exact width in between the two at about 5" from the top.

Do the same with the shorter span side legs.


A good height for the lower shelf is about 5". Mark that position on each leg on each side that a support will be attached and attach clamps at that height.

Glue, tack brad nail and then recessed screw the supports to the legs on all for sides.
DO NOT ATTACH THE LEGS TO THE SEATING SURFACE


Remove the seat, and start applying support for the structure. Since we cannot judge the sturdiness of your handy work, we can only suggest where to put additional support. This is a good example of a solid frame once glued & screwed together.
Keep adding support until your frame only wiggles a slight amount.

Now we need to fill any screw/nail holes with wood filler and sand.


Measure the width between your long side supports for the lattice inserts on the bottom shelf. We suggest you take multiple measurements across the entire span, ours fluctuated about 3/16" of an inch from the ends to the middle.
Cut your lattice and test placement, when satisfied glue down each one with a small drop.


Buy your preferred stain color, stain the frame and set aside to dry


The Cushion:
spray glue
2" foam
quilt batting
upholstery buttons 3/4" (create your own)
fabric (2 yds.)
drill with 3/8" bit
elongated box cutter/utility knife
jewelery wire 20-gauge
flat head screwdriver
3/4" wood screws
staple gun
There are many tufted tutorials on the net, we've tweaked a few to come up with this solution, so whichever one you follow should get you to the same point.
We found this foam & batting at Walmart, it cost $15 total. The foam is (4) 16x16 panels and since 16x3=48" (the width of our bench) it was a perfect match, with no cutting required.

Spray glue 2 layers of the foam

The next step is to mark out your diamond pattern on the foam. Spacing of 8-1/2" between each dot in a row seemed to work the best, The diagonal measurement from row to row is 6".

Now for some not so fun parts.
You will need to clear about a 1/2" hole for each of your tuft locations. We did this by using the utility knife and stabbing down into the foam and scraping the blade against the wood surface, trying to carve out a square. You can then use your fingers to pull out the foam from your hole, even pushing it out of the way deep in the hole will work fine as well. It will need to be clear because the foam will get tangled in your drill bit very easily.


Bottom view after drilling holes

Now, take your 3/4" wood screws and attach one close to each hole drilled, leave it sticking up about 1/4", the location isnt important. This will give the wire holding your buttons something to grab on to.

Cover with your batting, making sure that you have at least 6 inches of overhang on each side

Staple your batting and poke holes through with your finger or screwdriver at the button locations

We have a chocolate/slate blue theme in our master so we went with a muted blue chenille fabric from Joann's

Make your buttons, the plastic needles shown ended up not being needed.

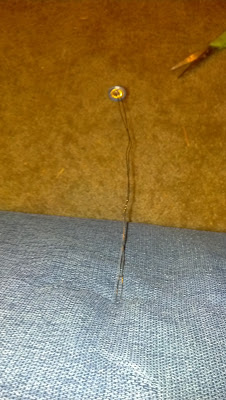
Clip about 12" of wire, thread a button and move the button to the middle of the wire and fold in half, lightly twist the free ends of the wire so that they make as thin of a point as possible so that they will not catch the foam upon entry...repeat for as many buttons as you need.

Flip the bench on its side so the bottom is facing you. Take your flat head screwdriver and gently poke it through the center hole, just so that you see a peak in the fabric. Take your scissors and snip at the tip of the screwdriver making a hole of about 1/8"
Take one of your button/wire combos and poke it through the hole in the fabric, you may need to use your other hand to coax the wire tip all the way through the foam hole and plywood and once it comes out the other side, pull it firmly to the depth of tufting you like and wrap the wire around the screw head nearest to the hole.
...repeat for all of your holes, circling out from the center.


DO NOT TRIM THE FABRIC YET
Place on frame and attach.
Now staple your fabric to the undersides one small section at a time, making sure youre happy with how it looks on top. The hardest part here was making the corner pleats neat, just take your time.
It took about 90 min to staple and fold and tuck and staple and fold and tuck...


You guys are the most skilled and creative people EVER!
ReplyDeleteAww thanks so much, its really a lot of fun :)
DeleteOMG, this is AWESOME. You could do the same thing and make a headboard! Love it!
ReplyDeleteAbsolutely. Just cut your shape, add some foam & batting and tuft away!
DeleteCan I hire you guys?? !!!! Thanks for the pics, we may try this on the cornices !!!!!!!You guys rock!!!!! You should start a business !!!!
ReplyDeleteHaha thanks! With all of this business talk going on, we definitely need to start thinking seriously about expanding our reach a bit. We already have random people asking us to make custom benches & ottomans :)
DeleteAnd yes tufted valances sound like a great idea and will definitely luxe up a space...another one added to the list :)
DeleteGreat projects, but where the hell do you find the time?
ReplyDeleteThanks Henry! I know it looks crazy, but we really only spend an hour or two a day doing this stuff. Each day we set a goal, and after a about a week, something else gets done.
DeleteWith everything else going on work, kids, life, believe me, were not spending all day doing this, but you do need to be motivated :)
I was going to ask the same question! Where do you find the time!? Nice work, yet again!!
DeleteBEAUTIFUL!!! You guys are should be proud of yourselves!!
ReplyDeleteCan't wait to see what you guys do next! ;)
GS
Okay, I am really NEED you guys to start a special blog for your home projects, turn it into a book and start your own television show. The business is a great idea too but you need to do the work and hire folks, not badd! However, the thought of just teaching people through a world wide audience is awesome and lucrative too
ReplyDeleteLol you guys are too much! Well we are actually already in the development stage of the new web site :) Stay tuned and thank you!
DeleteI love the bench! You could sell them for top dollar!
ReplyDelete