Of course you do need to already have a few things to keep the cost low:
Drill
Drywall Screws
Air Brad Nailer speeds the job up immensly
Drywall Compound
Paint
Stud Finder
Miter Saw/Box
After much debating we decided to go with a 6"h x 15" deep tray in the dining room. The casing on the DR entryways left us with 1' above the door, so we stopped the tray halfway, leaving room for the 3" crown that will be added later.

For the framing, we went with 2x2s instead of 2x4s as well as 3/8" sheetrock to keep the weight down and this also directly lowered the cost. Our DR is about 12x14 so this meant a length of (2) 2x2x8 for each course of framing. In total we used (24) 2x2s with a total cost of $40.
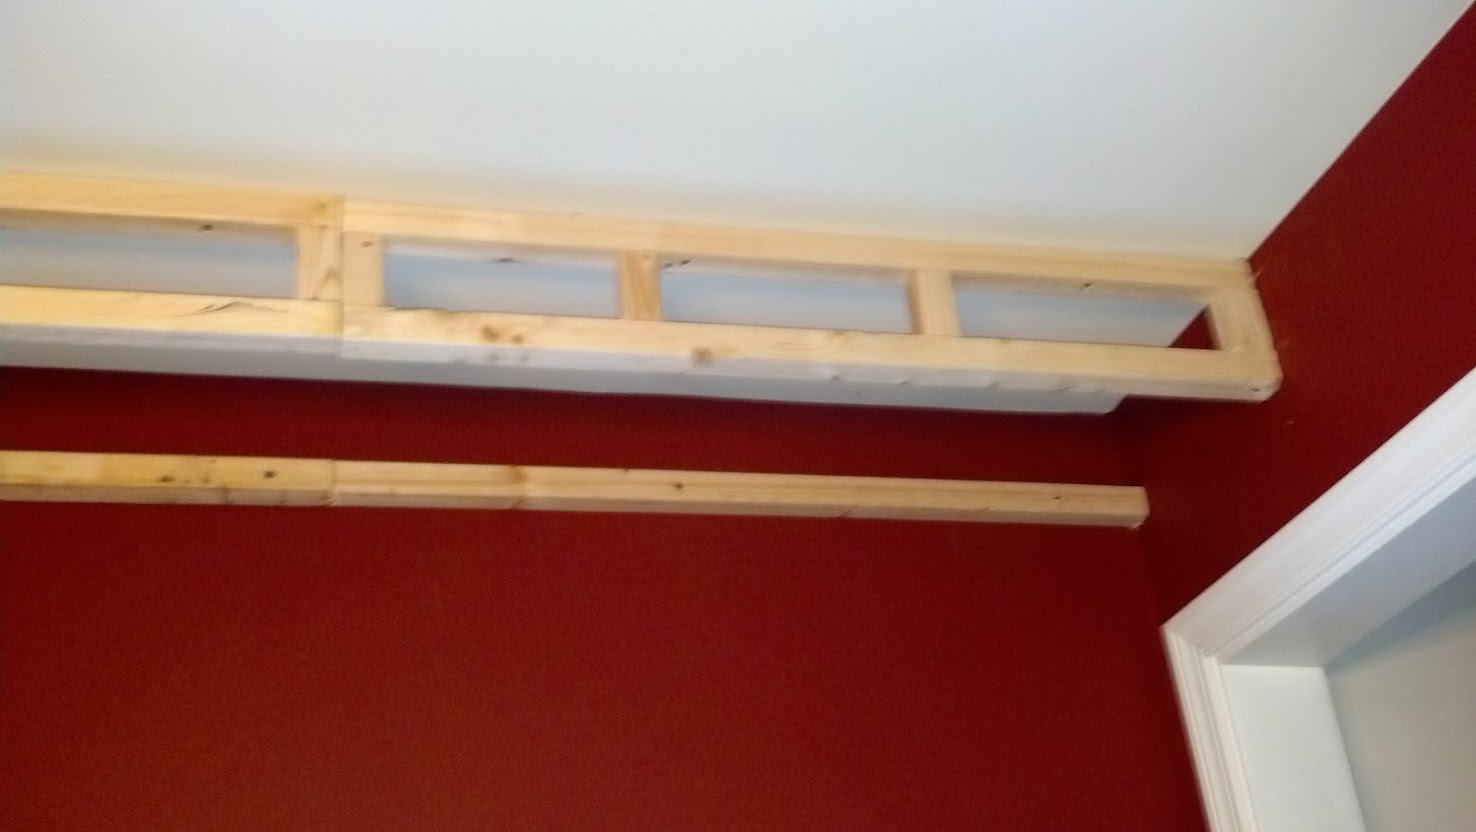
Once you determine how tall you want your tray, run a first course around the perimeter of the room at that height. It is the single piece of wood on the wall shown in the picture below. Some people use chalk lines around the room but we just marked the height every few feet. There is no need to miter since all joints will be hidden by drywall.
Always screw into studs and joists when creating any structural additions!
We accept no liability as to the validity or completeness of these instructions!

Next you will need to build some mini-ladder-ish structures to hold what will be the wall of your tray. Make sure you have determined where your ceiling joists are, as this also affects how deep your tray is to become.
If you are missing joists at prime locations, one option is to cut a hole in the ceiling (the part that will be hidden by the tray) and nail in your own cross members. Another option is to buy toggle bolts which have small arms that grab onto the top-side of the drywall to hang things.
These sections are small and will weigh about 10-15lbs each with the sheetrock attached and can easily be supported by either method
Since we decided on 6" height, each long 2x2 is 1.5" high, so 1.5 + 1.5 = 3 and in order to reach 6" we created 3" mini studs to end up with 6". Brad nail them together and also use wood glue or liquid nails.


We went with a 15" deep tray as we think much deeper than that makes the room feel smaller. Mark or chalk that width on your ceiling and attach the mini-ladders at those marks.

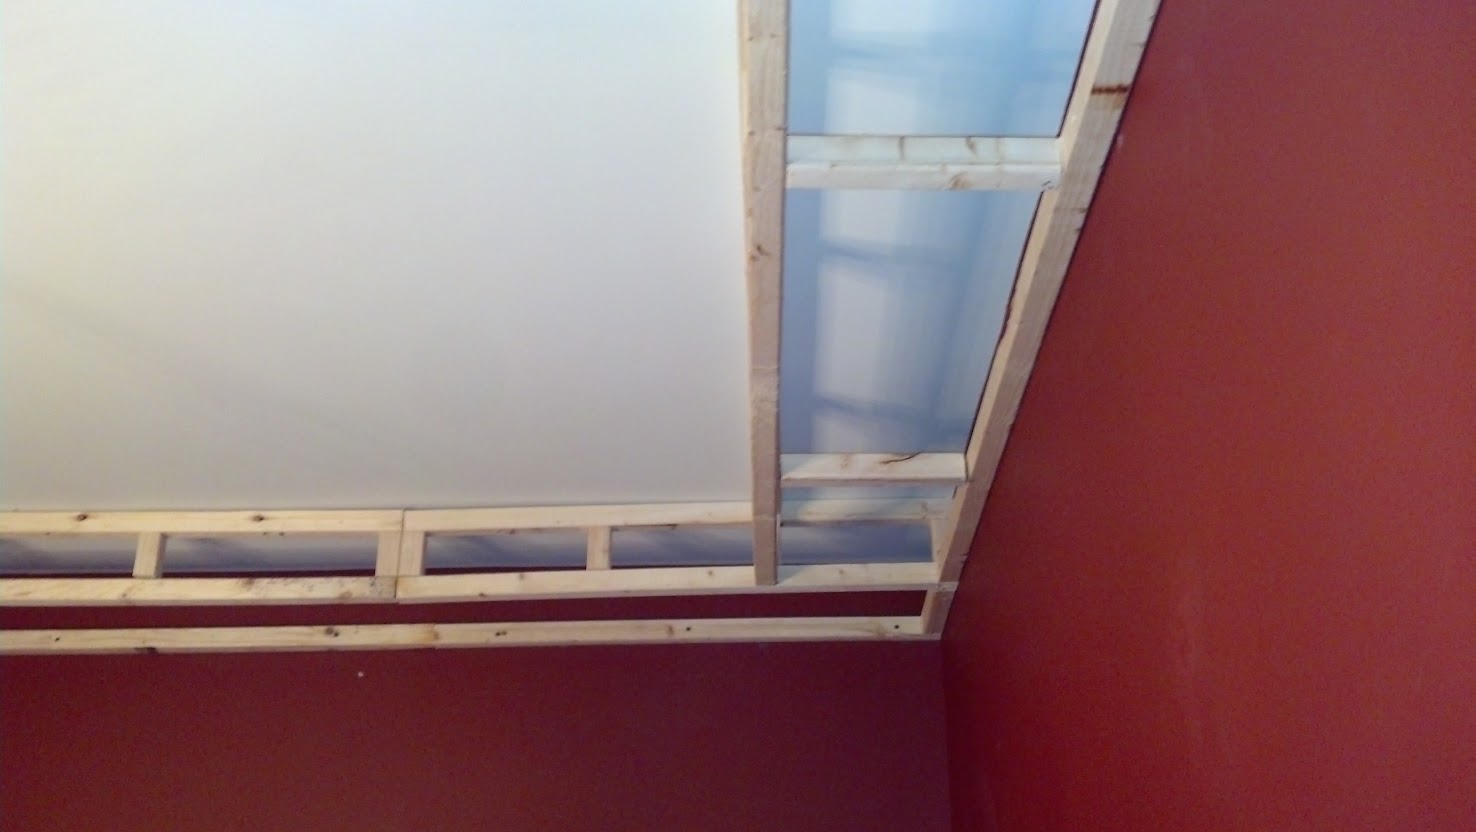
The last step is to add some 45deg mitered angle pieces to create the octagonal effect, these can be sized to taste but aesthetically the same length as the depth of the tray seemed to work best for us.

Updated 1/1
Happy New Year!!
The drywall went up and dried yesterday and since we typically stay home on 12/31, we brought in the new year doing our favorite things...drinking and painting (not a recommended blend but it was so much fun!) It turned out great and we LOVE our new tray ceiling, which again ran us exactly $76.24, talk about a score! Adding the crown will really make it pop. We also ran some electrical in the tray just in case we decide on some small recessed at a later date.
Next up: Crown Molding, Custom Built-in Shelving and some basement re-vamping with a wet bar & media room, and more...stay tuned :)
-- Ericka

 |
| even though the right side looks skewed in the photo, it is perfectly straight! just a weird perspective |
